

The pin is back, the wind is moving across the hole, and the number on the sprinkler head says something different from the number on the rangefinder. A golfer stands between two clubs, remembers the best shot ever hit with one of them, and then makes a decision based on hope rather than a repeatable carry window.
Learning how to pick a club on the course starts with rejecting the number stamped on the sole as the complete answer. The useful question is not, “What club goes this far?” It's, “Which club gives this golfer the best chance of carrying the required distance while keeping the ordinary miss in a safe place?”
The process can be fast. A sound decision uses the target, the carry requirement, the conditions, the lie, and the player's own distance and dispersion data. The practice tee supplies those inputs, and the course turns them into a committed choice.
Table of Contents
- The Moment You Stand Over the Shot
- Reading the Shot Before You Touch a Club
- Carry Distance vs Total Yardage
- Adjusting the Number for Wind, Elevation, and Lie
- Using Your Own Launch-Monitor Data
- Building a Repeatable Pre-Shot Routine
- Myths That Lead to Wrong Clubs
The Moment You Stand Over the Shot
The ball sits 168 yards from the pin, with water guarding the front of the green. The pin is toward the back, a light crosswind moves from the right, and a 7-iron and 6-iron lie beside the ball. The hesitation starts before either club is grounded.
Separate the required carry from the pin number. If the water reaches the front edge, the ball must fly beyond that hazard, not merely finish near the flag. The safer choice is the club whose ordinary carry window clears the water with room for a poor strike or a modest wind effect.
Your own yardage band matters more than the number stamped on the sole. A useful club profile records carry distance, maximum distance, and left-to-right miss pattern. One average distance conceals the spread that determines whether the ball reaches the target safely. Recent practice shots can reveal that spread and show whether the club's normal swing produces a dependable carry window.
Now account for the crosswind and the back pin. The target is a landing window, not the flagstick itself. If the 7-iron's dependable carry does not reach the front safely, the 6-iron is the practical choice, even if its longer miss demands a different starting line.
Practical rule: Pick the club whose normal swing carries the required distance, then accept the safest predictable miss.
That choice only works when the swing remains ordinary. Pulling the 6-iron and trying to manufacture extra speed turns a sound club decision into a low-percentage shot. Choose the club, set the intended start line, rehearse the shape, and make the same motion used on the practice tee.
The practice tee should give you more than a best-ever number. Test each club through the same pre-shot routine, note the carry window and common miss, then use those patterns when the course presents a narrow decision. Club selection becomes quicker because it is based on shots you can repeat, not on a distance you once happened to reach.
Reading the Shot Before You Touch a Club
The flag shows 165 yards, but water fronts the green and the wind is quartering from the left. That number cannot choose the club by itself. Read the hole first, then compare the required shot with your own carry window and predictable miss.
Eight checks before the decision
Hole layout. Identify the fairway, green shape, surrounding trouble, and usable recovery areas. Set the target only after you understand the space around it.
Pin location. Note whether the pin is front, middle, or back, and which side of the green provides room. A back pin can make a full-distance play a poor carry decision.
Carry obstacle distance. Find the distance to the first hazard or obstacle that must be cleared, whether water, a bunker, rough edge, or the front of the green. This can matter more than the flag.
Total distance to pin. Record the full yardage, but give it the right priority. It matters most when little trouble separates the ball from the target.
Wind direction. Read the wind along the ball's flight, not only beside the ball. PGA's club-selection guidance points out that the breeze can feel different in the fairway and near the flag.
Wind strength. Decide whether the breeze is light, steady, or gusting, then account for how it changes the shot's flight. A headwind usually calls for more club, while a tailwind can alter both carry and rollout.
Lie condition. Check whether the ball sits cleanly, is buried in rough, rests above or below your feet, or lies on a slope. The lie determines how much speed and contact the swing can produce.
Elevation change. Establish whether the target is uphill or downhill. The course-selection framework from St. Patrick's Golf Club puts yardage, conditions, and required flight into the same decision instead of treating distance as fixed.
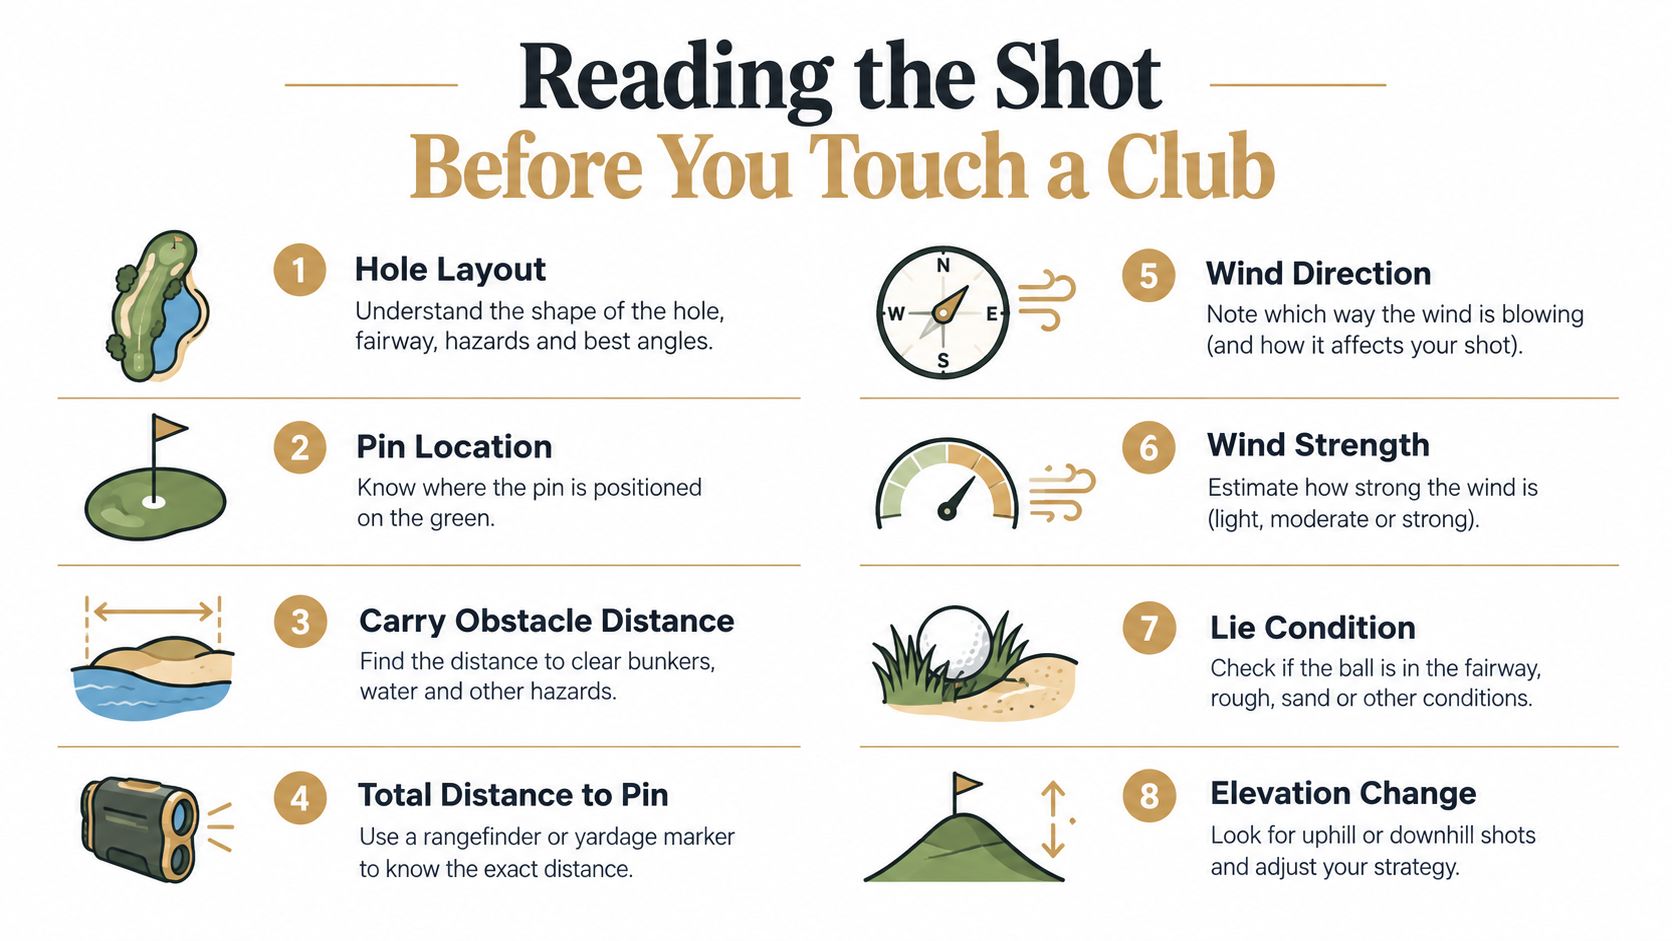
Run this list while walking from the cart or standing behind the ball. It should take seconds, not produce analysis paralysis. Its job is to stop one appealing number from overriding the lie, wind, landing area, or hazard.
Your shot shape is the final filter. A golfer who normally fades needs a different starting line from one who draws, and forcing the opposite shape can make a sound club unsafe. Choose the club whose normal swing covers the required carry, then aim for the safest predictable miss.
Use the practice tee to rehearse this decision. Test each club through the same pre-shot routine, record its carry window and common miss, and judge the shot by its repeatable pattern rather than a best-ever strike. For players working through a longer gap, a 4-hybrid distance guide can help frame the club's role, but the course still demands your actual carry window and miss pattern.
Carry Distance vs Total Yardage
Carry is the distance the ball travels through the air before touching the ground. Total yardage includes the rollout after landing. The distinction becomes decisive whenever the ball must clear something before it can use that rollout.
Consider a green-side bunker at 180 yards when the pin is 185. If the bunker guards the front and the ball must fly over it, carry wins the decision. A club that can roll to 185 but carries only 175 has failed before rollout can help.
A 220-yard carry over a creek to a back pin is a blended problem. The golfer needs enough carry to clear the creek, but the total distance still matters because flying the ball too far can remove the green or bring back trouble. The club must fit both the required flight and the landing area.
At 120 yards with no meaningful hazard, total yardage can anchor the choice. The golfer can select the club that normally finishes near the target and let ordinary rollout complete the shot.
| Situation | Carry / Total | Club Chosen | Why |
|---|---|---|---|
| Bunker guards the green | 180 / 185 | Club that reliably carries 180 | The hazard must be cleared in the air |
| Creek before a back pin | 220 / target beyond | Club matching carry and stopping window | Both clearance and final distance matter |
| Open 120-yard approach | 120 / 120 | Club matching normal total distance | There's no obstacle forcing a longer carry |
The most common mistake is using total yardage by default. That works on open ground, then fails badly when a front bunker, creek, or false front makes the first landing point more important than the flag.
A proper gapping chart should separate carry from total so the player knows which number is trustworthy in each situation. A gap-analysis guide can help organize that information into usable club bands rather than a list of optimistic maximums.
Carry gets the ball past the problem. Total distance determines where the ball finishes after the problem has been cleared.
Adjusting the Number for Wind, Elevation, and Lie
Raw yardage starts the decision. The club must match the shot in front of you, including its flight, landing point, lie, and likely miss. A flat, calm range number rarely survives unchanged on the course.
The PGA baseline is practical: learn how many clubs your normal swing needs into the wind, and how many it gives back with the wind. A course-adjustment approach uses 1 yard for every 1 mph of wind or every 1 degree of elevation change per 100 yards, rounding up when needed. The course adjustment guidance also places lie and target conditions inside the calculation, rather than treating them as afterthoughts.
Build the adjusted carry
A 150-yard shot into a 10 mph headwind can play like 160 yards under that rule. Do not force the original club harder. Select the club that normally carries the adjusted number with a controlled motion. Your own carry window matters more than the number printed on the sole.
An uphill shot adds another adjustment. A 150-yard shot rising 15 feet plays like 158 yards under the specified approach. An uphill lie also adds loft, which can reduce effective distance and usually points toward more club. A downhill lie reduces loft and commonly calls for less. The amount depends on the severity of the slope and your contact, so use your normal launch and carry patterns rather than a fixed guess.
A buried fairway lie can cost roughly a club on top of the other adjustments. Clean contact becomes less likely, and the ball may launch lower. The response depends on how deep the ball sits and how reliably you strike it. Protect the carry with a club that covers the required window, instead of trying to recover lost speed through extra effort.
| Condition | Adjustment per 100 yds | Example, 150 yd shot | Adjusted Carry |
|---|---|---|---|
| 10 mph headwind | 1 yd per mph | 150 + 10 | 160 yd |
| 15 feet uphill | 1 yd per degree per 100 yds, rounded up | 150 + 8 | 158 yd |
| Buried fairway lie | Roughly one club | Add a club after other adjustments | Depends on club window |
| Tailwind | Remove distance according to observed effect | Use a shorter club when carry and landing allow | Depends on conditions |
Account for quieter conditions
Temperature and altitude deserve attention, but they do not justify false precision. Cold air can reduce distance, while thinner air can restore some carry. Use experience from comparable rounds and practice sessions instead of applying a rigid number without knowing how your ball flight responds.
Shot shape changes the answer as well. A cut toward a left-side pin needs room to curve and may require a safer start line or more margin. A draw into the wind can behave differently from a straight shot, so automatically adding a club may send the ball farther into trouble. Match the adjustment to the flight you intend to hit.
Check the hazard last
The final question is, “Which club clears the trouble and leaves the most forgiving miss?” A flag-only decision ignores the front bunker, false front, slope, or side of the green that turns a small miss into a lost shot. The PGA's guidance on lie, carry, and deceptive wind likewise treats carry requirements and conditions as central to club selection.
If the adjusted number falls between clubs, use your dispersion and the hazard to decide. A longer club that clears the trouble with a normal swing is often safer than a shorter club that requires perfect contact. The practice tee should establish that carry window, then the course tells you how much of it the situation can tolerate.
Using Your Own Launch-Monitor Data
A launch monitor earns its place when it produces a personal decision guide, not a folder of perfect swings. Record how far each club carries on ordinary swings, where the ball usually finishes, and how much the result changes when contact or conditions are less than ideal.
Start with a repeatable session. Hit several shots with each candidate club, then record carry, total distance, lateral miss, and apex. Study the entire dispersion cloud rather than the average alone. A small sample can reveal an initial pattern, while a larger set gives a clearer picture of gapping and consistency. The goal is a carry window you can trust, not a single maximum number.
Read the cloud, not the highlight
A club that averages 150 yards but ranges from 138 to 162 presents a different course decision from one that averages 148 and ranges from 143 to 153. The averages are close. The second club gives you a narrower window around the target.
That difference should influence strategy. The wider club can suit an open target where extra maximum distance helps. The tighter club is preferable when a front hazard, narrow green, or short-sided miss makes variation costly.
Use the session to answer practical questions:
- Where does the club land most often? Find the central landing area, not the longest recorded shot.
- Which side owns the miss? A consistent left or right pattern changes your aim and hazard choice.
- How low is the floor? The shortest ordinary carry matters when the front edge must be cleared.
- What flight is repeatable? A stock swing and a knockdown version are separate shots, even with the same club.
Sort the bag by carry
Sort your gapping table by carry distance, not by the number printed on the sole. This exposes overlapping clubs, missing yardage bands, and clubs that travel similar distances with very different dispersion.
Label each shot pattern. A stock 7-iron, knockdown 7-iron, and flighted 7-iron are not interchangeable. Their launch, apex, spin behavior, and likely miss can differ enough to change the correct choice.
Build practical shot zones from recent sessions. You might find that your 7-iron carries 165 in calm air, 175 downwind, and 155 into a stiff breeze. Those are personal decision bands, not numbers to borrow from another golfer.
A launch-monitor practice guide can help structure the session. Bring the same record to the course, then select by carry window and dispersion instead of relying on memory.
Recheck the table after meaningful changes, including every 5 to 10 rounds, after a swing change, and at the start of a season. Remembered yardages can be unreliable. A 2026 distance summary found a difference between self-reported and GPS-measured distances averaging 10 to 18 yards across clubs. That distance analysis shows why your observed carry bands deserve more trust than the number you think you normally hit.
Building a Repeatable Pre-Shot Routine
A good decision can still fail if the golfer keeps reopening it over the ball. Lower-handicap players tend to spend more time considering club selection and planning before committing. A think-aloud study reported club-selection consideration on 88% of observed shots for high-level golfers versus 65% for low-level golfers, with planning on 82% versus 52%. The study record.pdf) supports treating club choice as a planning sequence rather than a last-second lookup.
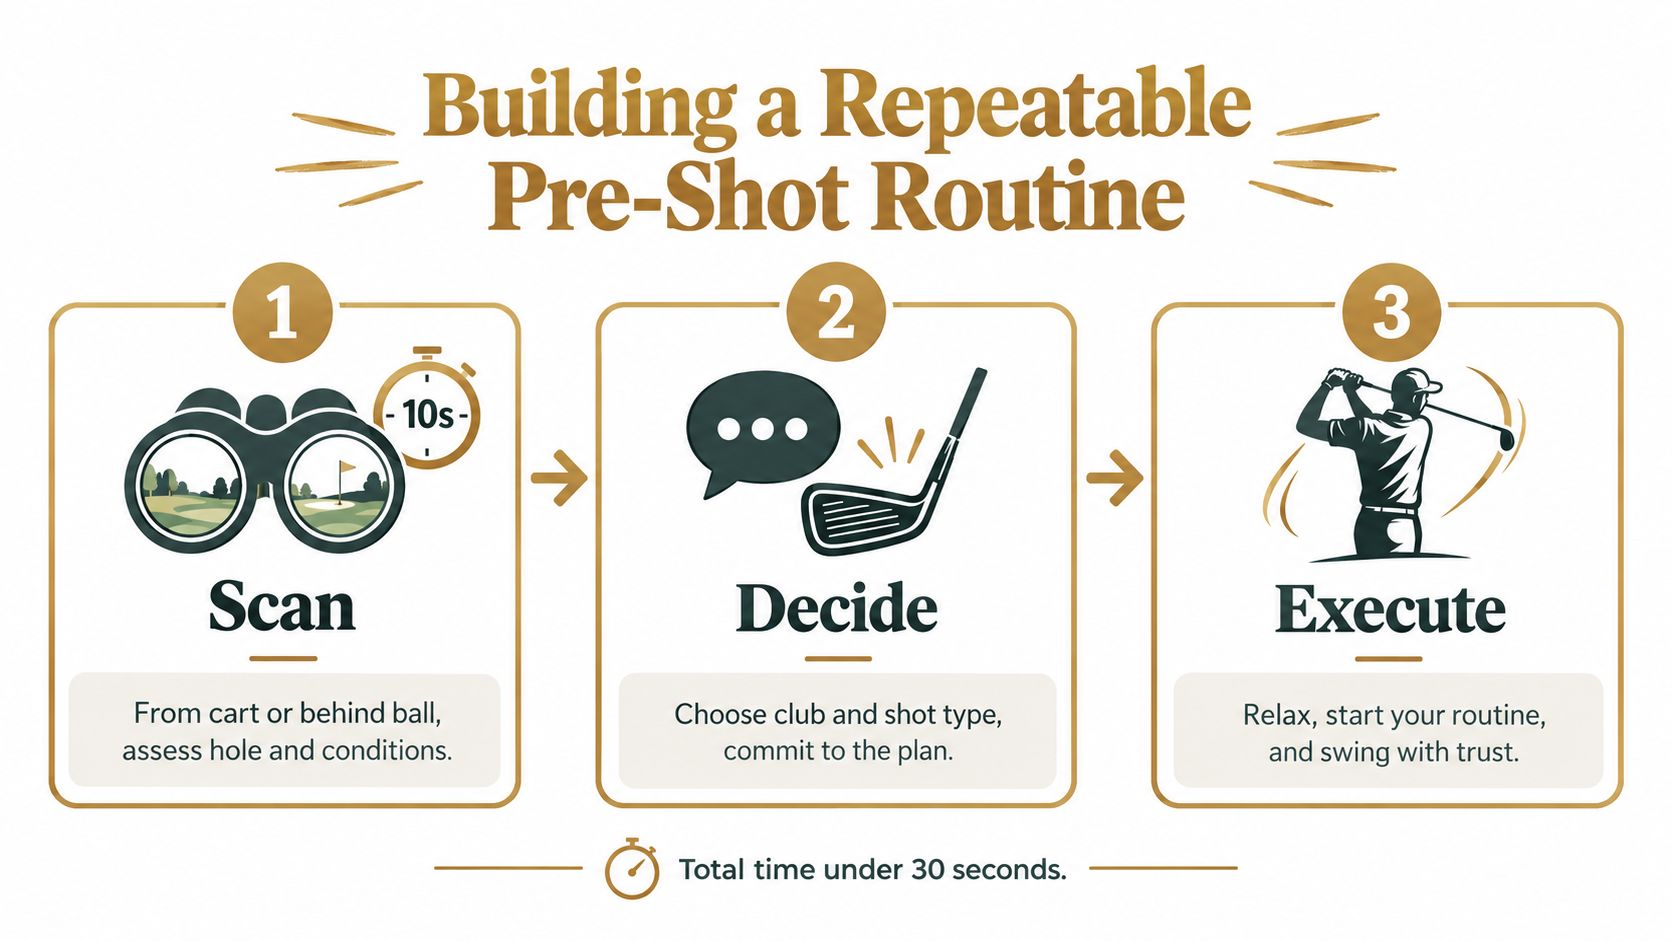
Scan for ten seconds
From the cart or behind the ball, the golfer identifies the carry number, wind, and safe landing area. This first phase should remain visual and simple. The player isn't choosing a club yet, but is deciding what the shot must accomplish.
A written yardage card can show the shape of the hole, while a rangefinder supplies the target information. The useful output is one clear carry requirement and one preferred landing window.
Decide during the walk
The walk to the ball converts those observations into one club and one shot shape. The golfer accounts for the lie, elevation, and wind, then chooses the club that fits the personal carry band.
If the number still feels shaky after the walk, the next club up is usually the better call. Another rehearsal won't create distance or remove a hazard. It often just gives doubt more time to take over.
Execute in ten seconds
At address, the player rehearses the intended motion, picks one swing key, and starts the routine. The club decision is finished before the golfer settles over the ball. Changing clubs after stepping in is a quiet leak because it replaces a planned choice with a reaction to nerves.
The routine should be practiced away from the course. A range session can include a target, a random yardage, a quick conditions assessment, and one committed swing. The golfer should occasionally run it after several simulated shots or a demanding practice sequence, because the back nine rarely offers a calm, perfectly fresh decision.
The complete process takes under 30 seconds when the inputs are familiar. Planning does the work before address, and execution becomes simpler because the player isn't trying to solve the hole while swinging.
Myths That Lead to Wrong Clubs
Many poor club choices come from rules that sound helpful until the lie, wind, and hazard disagree. “Take the club that goes the farthest” is one of them. Maximum distance is a performance possibility, not a reliable carry window.
The same problem appears when golfers use one club for one yardage in every situation. A 150-yard shot from a clean fairway lie in calm air isn't the same shot as a 150-yard shot from a buried lie into a headwind. The club number stays the same, but the required flight and expected strike have changed.
| Common Myth | Why It Fails | Correct Rule | On-Course Cost |
|---|---|---|---|
| Pick the club hit farthest | The longest shot may be an outlier | Use the recent ordinary carry window | Short carries and penalty areas |
| Swing harder when the number feels long | Extra effort changes contact and dispersion | Choose the club that reaches the carry with a normal swing | Weak strikes, pulls, and blocks |
| Use the same club for the same yardage | Wind, lie, elevation, and shape alter the shot | Recalculate the plays-like carry | Wrong trajectory and poor distance control |
| Trust flat-range numbers everywhere | Course lies and conditions change launch and contact | Adjust from tracked data and the current lie | Missed greens and short-sided recoveries |
| Aim at the pin because it's the target | The pin may sit beside the worst miss | Choose the safest landing window | Avoidable bunker, water, or rough |
| Take one extra club automatically | A blanket rule ignores wind strength and direction | Add only what the conditions require | Long misses and lost recovery space |
The best reference for a tight pin is the player's recent pattern, not the best ball ever struck. A last-week average may still be too broad for a narrow target, but it reflects reality better than a single flushed shot that rarely appears under pressure.
Headwind decisions deserve the same discipline. Adding a half club can be sensible when the player has observed that effect in similar conditions, but guessing at the adjustment without knowing the ball's behavior replaces one assumption with another.
The club should also be selected around recovery tolerance. A miss that leaves a straightforward chip may be acceptable, while the same miss beside a deep bunker or water hazard may turn a marginal club into a poor one.
Dialed Golf is built around that personal record. Its consumer app functions as a pocket caddy on the course, while its desktop experience supports launch-monitor practice with live pairing first for Garmin R10 and expanding, along with CSV and import workflows from Garmin, Rapsodo, SkyTrak, FlightScope, Uneekor, GSPro, Awesome Golf, and more. Dialed Golf also offers Dialed Academy memberships and front desk tools for ranges and clubs at $99.99 per month or $999.99 per year, with the club keeping its dues, while free web tools remain free. Golfer Pro is available across the app and desktop at $9.99 per week, $29.99 per month, $149.99 for six months, or $249.99 per year. The consumer app is currently in TestFlight rather than general App Store availability, and live pairing is desktop-first, with mobile live pairing planned later.
Use the next round to record the actual carry, identify the common miss, and make every club choice around the landing window instead of the number stamped on the hosel. Then visit Dialed Golf to turn launch-monitor sessions and on-course decisions into one golfer record, with a pocket caddy that reflects the player's own carry bands and dispersion.