

The ball is sitting 164 yards from the flag, the lie is clean, and the green looks inviting. The 7-iron usually carries close enough, but the 6-iron feels safer. Then the player notices the bunker guarding the front, the trouble long, and the wind moving across the hole. Two clubs remain on the ground, and the hesitation has already made the shot harder.
That moment is where on course club selection either saves a stroke or gives one away. The right choice isn't the club that reaches the flag on a perfect strike. It's the club that gives an ordinary swing the best chance of reaching a useful landing area while keeping the common miss away from the worst trouble.
Dialed Golf approaches the problem as a risk-managed pocket-caddy workflow. The foundation is a player's own carry windows and dispersion, followed by a fast in-play checklist, then post-round review. Generic yardage charts can start the conversation, but they can't account for how one golfer misses with a hybrid, how another loses carry from a poor lie, or how a narrow landing zone changes the sensible tee-shot club.
Table of Contents
- Why On Course Club Selection Feels Harder Than It Should
- Build Your Carry Gapping Foundation Before You Tee Off
- The Five Factor Decision Checklist You Can Run in 20 Seconds
- Real World Scenarios From Tee to Green
- Use Your Personal Data and Pocket Caddy Without Slowing Play
- Drills and Habits That Make Better Club Choices Automatic
Why On Course Club Selection Feels Harder Than It Should
Most club decisions become difficult because golfers ask one number to answer several different questions. The flag may be 150 yards away, but that number doesn't say whether the ball needs to carry a bunker, stop on a firm green, avoid a back edge, or finish somewhere that leaves a simple next shot.
A personal carry profile gives the decision a more useful starting point. A USGA analysis of golfers' tee-shot decision making found that club choice is driven primarily by the golfer's average driving distance, the presence of obstacles or penalty areas, and the golfer's own driver accuracy, using ShotLink-based decision trees in its analysis. That supports a practical conclusion: club selection should begin with what the golfer carries, then account for where the ball tends to disperse and what waits near the landing area.
The perfect number is usually the wrong number
A player who hits a 7-iron 160 yards once may start treating 160 as the club's identity. On the course, that “perfect” number often creates a guarded swing. The golfer tries to manufacture the strike, adds tension, and leaves the ball short.
Reliable carry windows work better than best-ever distances. Independent guidance recommends using stock carry rather than a maximum, building roughly 10 to 15 yards of separation between clubs, and choosing a club that covers the intended area with a normal swing, as outlined in this personal golf club distance and gapping guidance. The useful question isn't, “Can this club get there?” It's, “Does this club get there when the strike is normal?”
Practical rule: If the decision is close, choose the club that protects the dangerous miss and still reaches the target on an average strike.
Aggression needs a reason
Aggressive targets feel productive because they point directly at the flag or the narrowest part of the fairway. They aren't automatically better. A 2026 study on tee-shot strategy reported that within-player deviations toward aggressive decisions were associated with higher scores relative to par by about half a stroke per hole, according to the Frontiers in Psychology research. The lesson isn't to play every shot defensively. It's to demand a clear reward before accepting additional exposure.
The system starts before the round with a defensible gapping chart. During play, it asks about the safe landing area, contact, conditions, trouble, and dispersion. Afterward, it records whether the club and target matched the plan. That sequence turns indecision into a repeatable call instead of a fresh argument with the yardage book on every hole.
Build Your Carry Gapping Foundation Before You Tee Off
A useful gapping chart describes the shots a golfer can reproduce, not the shots that look impressive on a launch-monitor screen. The chart should be built around carry distance, because carry determines whether the ball clears a hazard or reaches the intended landing area. Roll matters after landing, but it can't rescue a shot that never flies far enough.
Start with stock strikes
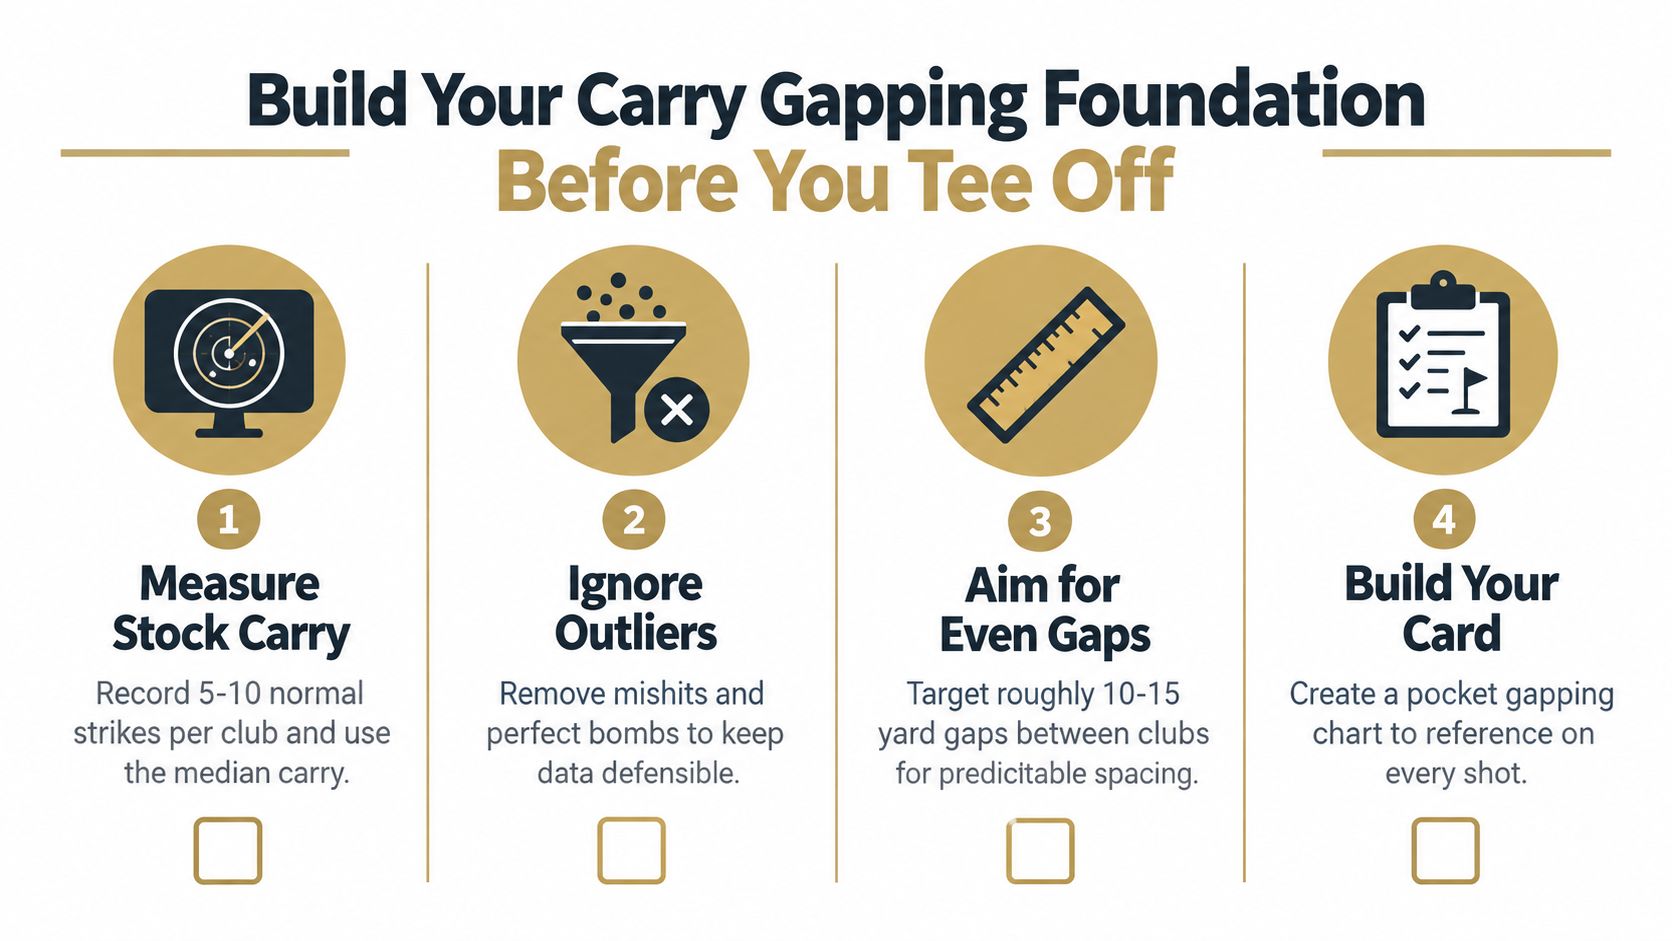
A practical session begins with a consistent warm-up, then several normal swings with each relevant club. A golfer can record 5 to 10 ordinary strikes per club and use the median carry, a method represented in the accompanying gapping checklist. The point isn't to reward the longest ball. It's to establish the carry that survives a typical swing when rhythm, contact, and attention are good but not perfect.
Mark the shot quality as the session progresses. A thin strike, heavy strike, obvious mishit, or unusually perfect bomb shouldn't define the club. Remove those outliers from the working chart, then preserve the raw session separately so the data remains available for later review.
The chart should show a window rather than a single promise. For example, a club might have a stock carry centered around one value, with a shorter ordinary outcome and a longer ordinary outcome recorded beside it. That makes overlap visible. If two clubs cover nearly the same landing distance, the issue isn't solved by guessing harder on the course.
Build useful spacing, not a perfect ladder
Independent guidance recommends aiming for roughly 10 to 15 yards between clubs, while also accounting for the fact that real sets may not produce clean spacing. A gap that is too small creates redundant choices. A gap that is too large forces a golfer to overhit one club or take too much off another, both of which raise dispersion.
Use the front, middle, and back of the green when translating the chart into decisions. A cited benchmark in the same guidance places a 25-handicap golfer an average of 59 feet from 80 yards and 119 feet from 150 yards. Those figures reinforce why pin hunting can distort the decision. The expected result is rarely a laser-like ball beside the flag, so the chart should help the golfer cover a sensible green zone rather than chase a single number.
Preserve the session for future questions
Data becomes more useful when it stays queryable. Keep the club, carry, launch conditions, strike quality, lie, and session date together. When a club suddenly appears short, the golfer can check whether the change came from contact, temperature, setup, or a real shift in the swing.
Launch-monitor data doesn't have to remain trapped in one device's software. Up Your Club's launch-monitor interoperability page lists CSV exports and workflows covering Garmin R10 and R50, FlightScope Mevo, Mevo+, and X3, SkyTrak and SkyTrak+, Foresight units, Uneekor systems, Rapsodo monitors, Square Golf, GSPro, Awesome Golf, Golfboy, and InRange. A separate compatibility listing for supported launch monitors also names Garmin R10, FlightScope Mevo, Mevo+, X3, and Uneekor EYE XO, EYE XO2, QED, and View.
The final output should be simple enough to carry. A printable card or compact digital chart beats a detailed dashboard that takes too long to interpret between shots. The golfer needs a dependable answer, not a research project.
For a deeper process on identifying the spaces between clubs, use this guide to golf gap analysis.
The Five Factor Decision Checklist You Can Run in 20 Seconds
A gapping chart tells a golfer what the clubs normally do. It doesn't decide whether the next shot calls for the normal club, an extra club, a safer target, or a different line. That decision needs a short sequence that starts with the intended landing area and finishes with commitment.
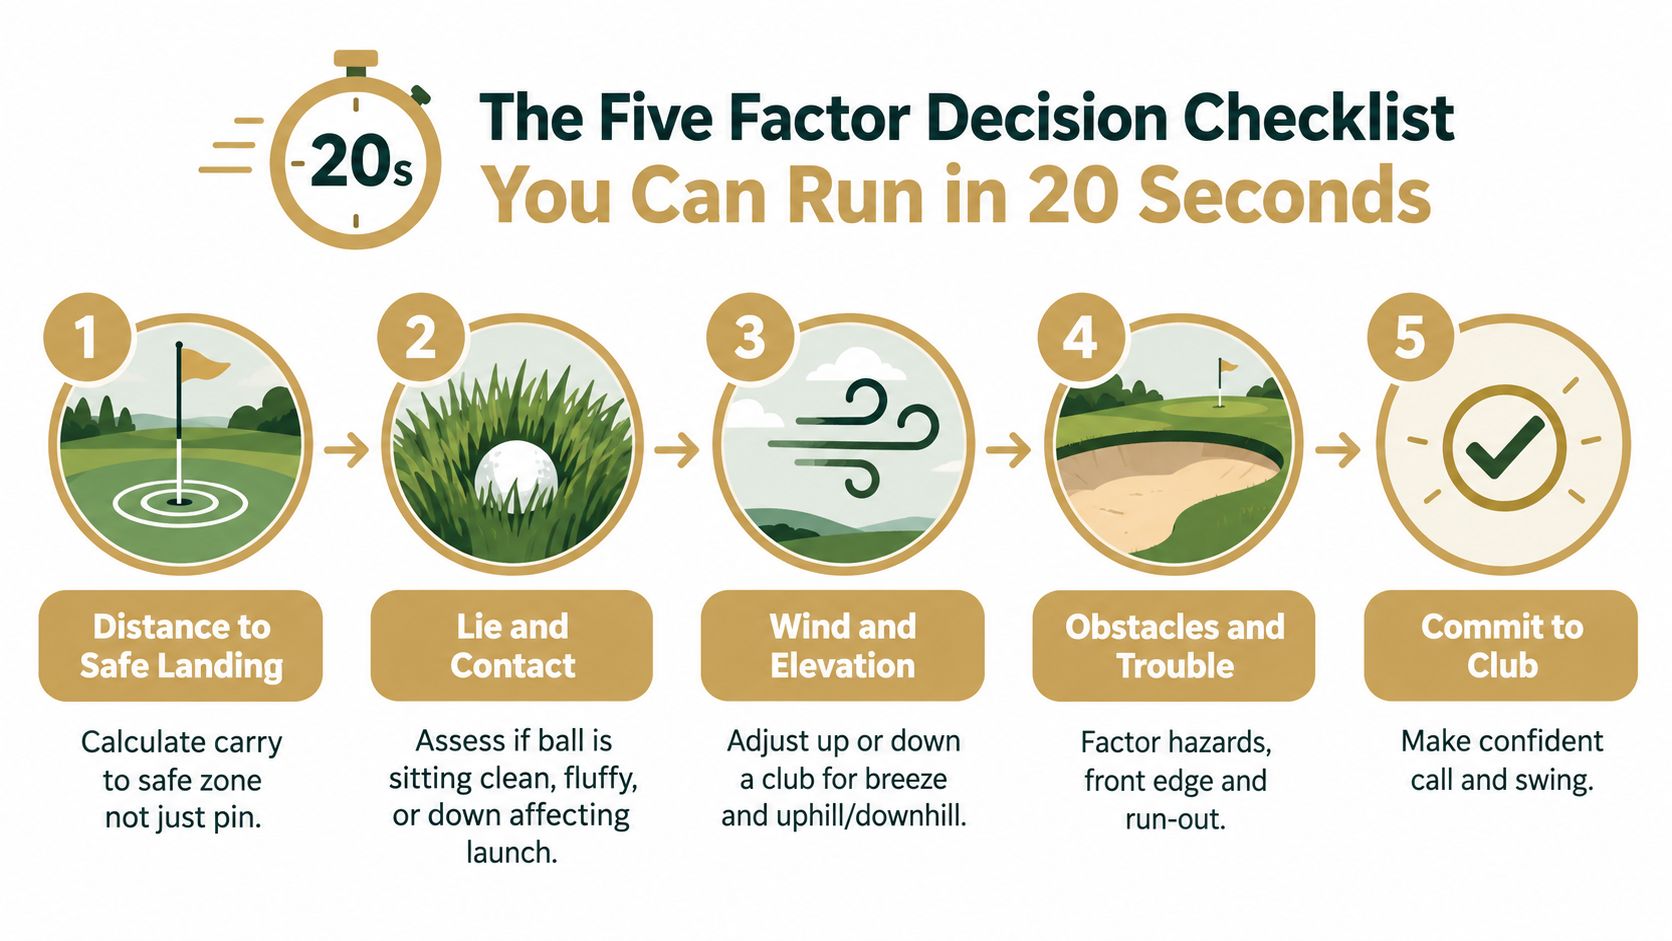
1. Distance to the safe landing area
Don't begin with the flag if the flag isn't the target. Identify the front, middle, or back portion of the green that leaves room for error. On a tee shot, define the usable fairway rather than measuring to the hole as if every part of the fairway carries the same value.
The golfer's actual carry profile comes first. If the safe zone requires a carry that sits near the top of a club's ordinary window, the next club may provide a better average result, especially when a short miss brings trouble into play.
2. Lie and contact quality
A clean fairway lie supports the stock number. A ball sitting down in rough may launch lower, lose carry, or arrive with less predictable spin. A fluffy lie can create a different problem, particularly when the club may slide beneath the ball or add unwanted launch.
The question is simple: can the golfer expect the usual strike? If not, the chart's normal carry isn't the correct input. Club up when the lie threatens carry, but don't assume extra club fixes a contact problem when the ball may come out hot or with an unpredictable flyer.
3. Wind and elevation
Wind changes the relationship between carry and landing point. Uphill shots generally require more carry, while downhill shots may need less, but the adjustment should be tied to the landing area and the golfer's flight rather than an automatic club swap.
Use a measured response. If the wind is strong enough that the usual club barely covers the safe zone, take more club and make the same controlled swing. If the target is downhill toward trouble, the conservative choice may be a club that lands short of the flag but avoids bringing the long miss into play.
4. Obstacles and penalty proximity
The USGA material frames club selection as a risk-management problem, especially from the tee, where penalties can dominate scoring outcomes. Look at the hazard's proximity to the carry window and the golfer's dispersion, not merely whether the hazard exists.
A tee shot with a narrow landing zone can make a shorter club sensible if it keeps the common miss away from penalty trouble. Conversely, a longer club may be correct when it carries the hazard comfortably and opens a wider second-shot area.
5. Confidence and dispersion
Confidence isn't a mood to talk oneself into. It reflects the club's recent contact, directional pattern, and predictable miss. A golfer who carries one club farther but sprays it wider may have a worse expected outcome than a golfer using a shorter club with a tighter window.
The final call should take only a few seconds. State the target, select the club, visualize the normal flight, and swing without reopening the debate.
Real World Scenarios From Tee to Green
The checklist becomes valuable when the hole refuses to offer a clean textbook decision. The same player may choose a different club on consecutive holes because the landing zone, miss direction, and penalty structure have changed.
Tight tee shot with trouble
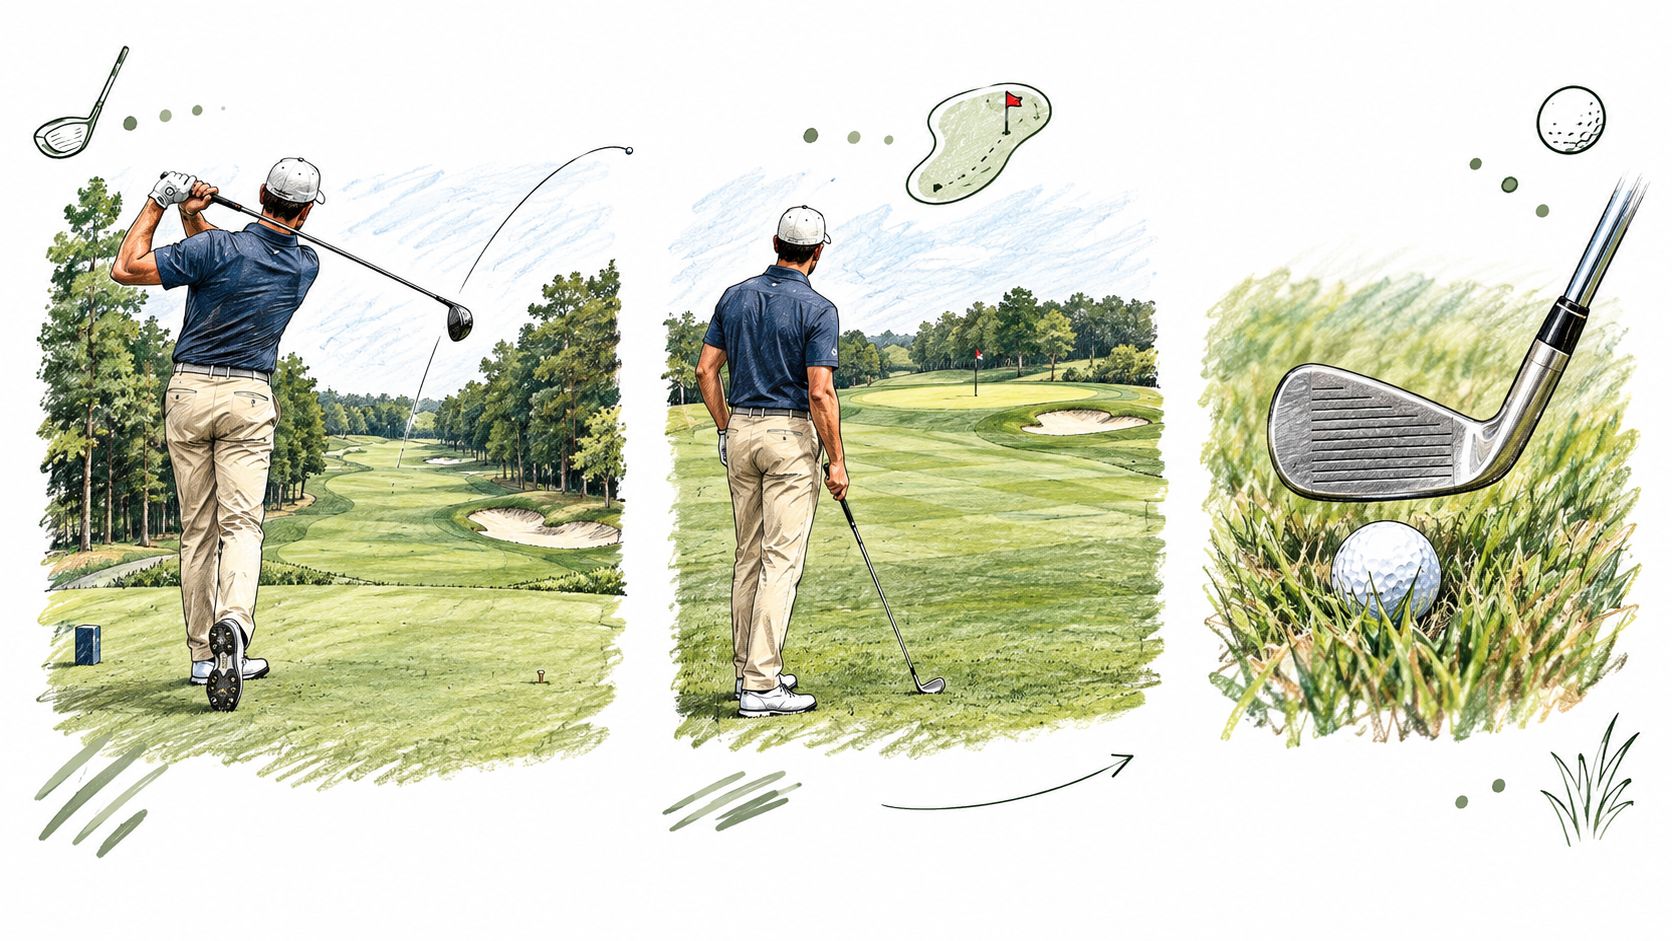
A narrow fairway has trees on one side and a penalty area on the other. The driver might reach a favorable position, but the golfer's driver dispersion brings both hazards into the active miss pattern. The sensible club may be a shorter option that leaves a longer approach while removing one side of the hole from the decision.
That isn't automatically conservative. It becomes conservative only if the shorter club still leaves a poor angle or fails to clear a meaningful obstacle. The correct call balances expected position against the chance of a penalty.
The tee-shot question: Which club gives the ordinary swing the widest useful landing area, not which club produces the longest possible drive?
Fairway approach to a middle pin
The flag sits near the middle, with a bunker short and a difficult recovery beyond the green. The front edge is the immediate carry requirement, but the back edge defines the risk. A player whose stock 7-iron carries the safe middle comfortably may choose it. A player whose normal carry barely reaches the front should take the extra club and aim at the center.
The target isn't the flag. It's the portion of the green that leaves a manageable putt or next shot after a normal strike. If the golfer's dispersion is biased short, the plan should address that pattern directly rather than pretending every miss has equal probability.
Ball sitting down in rough
The distance may match a familiar iron number, but the lie changes the contact forecast. A ball sitting down can reduce carry and produce a lower flight, so the golfer should first decide whether the green is reachable with a reliable strike. If the required carry is marginal, taking more club may be appropriate, provided the longer club can still be delivered cleanly through the rough.
When the lie makes the long club unstable, the better choice may be a shorter club to a safe area. A forced green attempt that depends on perfect contact isn't an aggressive strategy. It's a low-probability swing disguised as ambition.
Punch-out recovery
A tree line blocks the direct route to the green. The player has enough distance with a low-lofted club but no margin if the ball catches a branch. The decision starts with the exit corridor, not the hole. Choose the club that keeps the ball under the obstruction and returns it to a useful portion of the fairway.
The best recovery often sacrifices distance to restore control. A punch-out that leaves a full approach is usually preferable to a heroic attempt that advances the ball only slightly or adds another penalty.
Short game around the green
Around the green, club selection depends on landing point, rollout, lie, and the amount of green available. A putter may be appropriate from a tight lie with a clear path. A low-lofted chip can work when the ball has room to release. A higher-lofted option earns its place when the landing area is constrained or an obstacle demands height.
The mistake is choosing the club based only on the distance to the flag. The landing spot and rollout pattern determine whether the ball can finish in a useful zone.
Green-side principle: Choose the shot with the most predictable first landing, then let the ball's normal release do the remaining work.
Use Your Personal Data and Pocket Caddy Without Slowing Play
A good on-course system must be faster than the indecision it replaces. The golfer shouldn't need to inspect every available metric before choosing a club. The practical workflow is a quick reference to personal carry windows, followed by the five-factor check, followed by a brief record of what happened.
Dialed Golf is structured as three products, one golfer record, and one Pro plan. The consumer app functions as a pocket caddy on the course, currently through TestFlight rather than general App Store availability. The desktop product supports launch-monitor practice at a range or garage simulator, with live pairing first through Garmin R10 and expanding, alongside CSV and import workflows for Garmin, Rapsodo, SkyTrak, FlightScope, Uneekor, GSPro, Awesome Golf, and more.
Prepare before the first tee
Before the round, the golfer should open the current carry chart and identify any clubs with overlapping windows or missing gaps. Conditions then modify the base number. The chart supplies the normal strike, while wind, elevation, temperature, lie, and target shape supply the adjustment.
During play, the pocket-caddy workflow should answer three questions quickly:
- What is the carry to the safe landing area?
- Which club covers it on an ordinary strike?
- Which miss must be kept away from trouble?
The result is a decision aid, not a replacement for judgment. It should keep the golfer focused on target and swing rather than encourage repeated screen checks.
Import practice data, then learn from choices
A launch-monitor session becomes more valuable when the golfer can compare clubs across sessions instead of relying on memory. One documented workflow shows FlightScope data being exported as a CSV file from the PC software, while Uneekor VIEW data can be imported from a local VIEW.bytes file, as described in this launch-monitor shot-data import guide. That kind of movement from device software into analysis supports a more durable golfer record.
After the round, log the club, intended target, conditions, strike quality, and result. The review should look for repeated mismatches, such as a club that reaches the target only with a perfect strike or a tee-shot choice that repeatedly exposes the same penalty miss.
For more detail on how a launch-monitor workflow can support practice and course decisions, see this launch-monitor app guide.
Free web tools remain free and serve as the top of the funnel, not as a disguised Pro requirement. Golfer Pro is offered across the app and desktop at $9.99 per week, $29.99 per month, $149.99 for six months, or $249.99 per year. Dialed Academy is a separate membership and front-desk product for ranges and clubs at $99.99 per month or $999.99 per year, with the club keeping its dues. The consumer product is a pocket caddy, and the desktop product is a launch-monitor practice workspace. Dialed Golf isn't hardware, a swing-analyzer camera, or a ranked list of golf apps.
Drills and Habits That Make Better Club Choices Automatic
Better club selection improves when practice tests decisions under uncertainty, not just clean swings from a perfect lie. A golfer who only hits balls toward a known distance may build a chart but still hesitate when the wind changes or the ball sits below the feet.
Test the carry window
Choose one club and hit a series of normal shots with the goal of reproducing the stock swing. Record carry, strike quality, and dispersion. The point is to identify the usable window and the common miss, not to raise the maximum.
Repeat the process with clubs that appear close together. If their carry windows overlap, test them against different targets and lies. One may be the better fairway club, while the other offers a more reliable launch from rough or a safer trajectory into a green.
Add course conditions to practice
A useful session changes one variable at a time. Practice an uphill target, a downhill target, a ball sitting down, and a shot where the safe landing area is different from the flag. The golfer should make the club call before looking at the result, then record whether the decision matched the available information.
Wind practice can be simulated through target changes and flight planning even when the actual breeze is light. The objective is to rehearse taking extra club without adding effort, and choosing less club when the back miss carries greater cost.
Review the decision, not just the result
A good decision can produce a poor result, and a poor decision can occasionally produce a perfect one. Post-round review should therefore ask whether the club covered the intended area on an average strike and whether the target respected the golfer's dispersion.
Update the carry chart only when a pattern repeats. One unusual shot shouldn't trigger a full rebuild. A consistent gap, overlap, or miss-direction issue deserves a focused retest, with one priority addressed before changing the rest of the bag.
The most dependable habit is simple: favor the club that reaches the target on an average strike, then commit to the swing that matches it. For golfers refining wedge control alongside selection, this guide to hitting a wedge provides a useful practice reference.
Dialed Golf gives golfers a pocket caddy for on-course decisions, a desktop workspace for launch-monitor practice, and one connected golfer record across both, with Dialed Academy supporting memberships and front-desk operations for ranges and clubs. Build a carry chart, test it against real course choices, and visit Dialed Golf to put that workflow into practice.